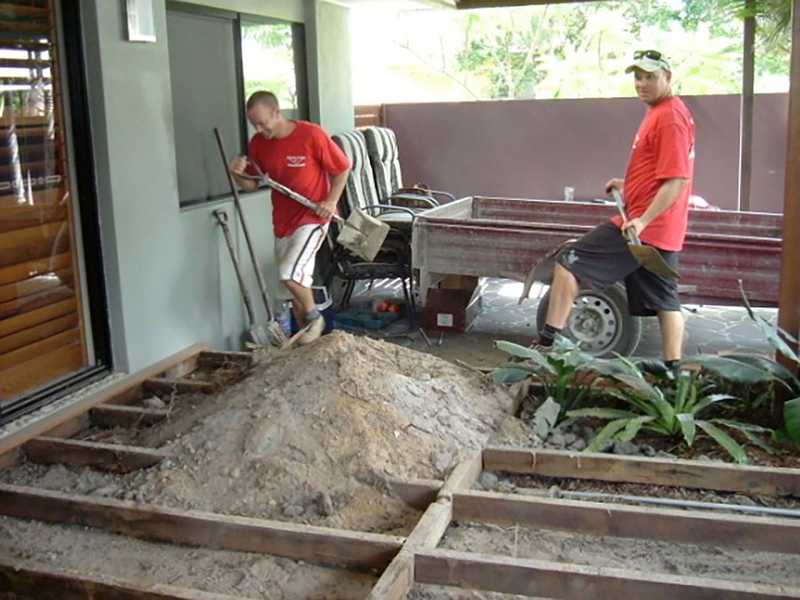
Building your own deck can be a challenging and stressful process, but if done the right way, it can be a great space for your family to enjoy for many years. Well-built decks can also add value to your property. DIY Decking Kits from DeKing can give you a great start towards completing the DIY deck of your dreams. In this blog we explain how to build a deck. These step-by-step instructions can help you along the way!
When selecting the perfect spot for your new deck, it is important to make a note of any existing features around your home and garden. You should pay extra attention to the placement of drains and any other external plumbing since, once the deck is completed, access to the areas underneath could be difficult.
Prepare the ground and account for drainage by laying some form of a drainage system. Surface water can cause an array of serious problems and shorten the life of your deck. Most manufacturers of these systems offer instructions for this part. You should also rake the surface clear of any obstacles.
During this step, care and accuracy can save you from future headaches. Take plenty of time to get the site marked accurately. Start by marking the length and width of your future deck where it will join any existing structure. Then, use scrap lumber to construct some corner hurdles. Drive two hurdles into the ground at each corner. Stretch a line of string or twine around the hurdles to form a box in your dimensions.
Compare measurements between all the lines to ensure that they are square. Then measure across diagonally opposite corners to verify your accuracy. Once you are confident that all your lines are parallel and equal, you will be ready for the next step.
Your stump holes should be spaced about 1800mm from the existing structure and approximately 1500mm from each other. These holes should measure approximately 300mm wide, 300mm long and 600mm deep. Dig each hole so that, once the stump is centred in the hole, the exterior edge of the stump meets flush with the line of string or twine.
Place a timber plate at the bottom of every stump hole before setting your stumps. Place the stump on the timber plate and brace it as necessary to keep it straight. Then use a mixture of about two concrete bags and two buckets of water to fill each hole. Check to make sure that each stump is plumb and correctly positioned.
When starting the framing step of building your own deck, you should focus on ensuring a solid transition between your new deck and your existing structure. If the existing structure features weatherboard, you should join the new bearers with the bearers from the existing structure. If the existing structure is brick or another material, you can connect a treated pine plate using masonry anchors.
Once you have fixed your plate and determined your bearer height, you need to transfer these dimensions to your stumps with a level and string line. Use a square-edge to mark off the dimension and cut the stumps accordingly.
To attach the bearers to the stumps, you can drive nails through the bearer and into the stumps at an angle. You can also use framing anchors and nail plates if you would like. Continually check all of your levels and angles throughout the framing process. The joists should set on top of the bearers every 400 to 600mm.

Since the surface will always be the most visible part of the deck, you should take plenty of time to ensure accuracy during this step. Each board of decking material needs to be square to the existing structure as well as the other boards. Although quality decking boards are dressed, you will undoubtedly run into a few bowed boards. Take care to ensure you are easing the bow as you nail the boards into place.
Drive one galvanised decking nail about 15mm from each board edge to secure the boards. Remember to leave a gap of approximately 4mm between each board for drainage. To avoid splitting, you can drill each board end before nailing. Always make sure that the joins in each board are staggered and occur on top of a joist. Leave some extra length overhanging on your boards so that you can cut them with a saw after completing the step. This will help you achieve a straight edge.
The finishing stage of your deck depends greatly on the materials you have chosen. Durable materials such as Merbau and Batu do not require a finish and treated pine comes with some protection, but most timbers need some form of deck finishing. There are thousands of different paint colours and staining options available to create the look you want.
Now that you’ve completed the finishing step, you can sit back and enjoy your work! Remember that the DIY Decking Kits from DeKing are a great option for making this project easier on you.
If however you would like us to professionally build a deck for you click here to see our decking calculator and find out how we can help you add an attractive outdoor living space to your home.

DeKing Decks service Brisbane, Redlands, Bayside, Logan, Ipswich, Moreton Bay, Gold Coast, and Sunshine Coast